Lucidica is the IT support team for London businesses.
Thanks for viewing this page, hopefully it helps you solve your technical issue if not feel free to drop us a line here and we’ll provide additional help and support.

Storage space on any mobile device is precious and running out of space on your iPhone can be extremely annoying. Lack of space on your phone can be limiting and can stop you from downloading any new apps or even from taking any new pictures. This problem, however, is easily rectified, you can simply backup all your photos and then clear them off your phone. If you’ve got hundreds or even thousands of photos, then this may take a while so I’d recommend setting this up before bed and leaving it to back-up overnight.
There are several different methods of doing this for example using Apple’s iCloud or backups to your PC, however, instructions below are for using Google Photos. In my opinion, this is the simplest method.
- Step 1
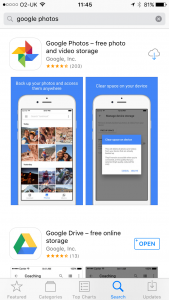
Download google photos app (not google drive)
- Step 2
Sign in or create your free google account
f you’re creating an account, you can use your current email address to set up the account. You don’t need a Gmail or google mail account.
When you’re running through the setup, you’ll get the option of either high-quality storage or original size. Unless you’re a pro photographer taking extremely high-quality images, you’re probably not going to notice a difference, so opt for Googles ‘high quality’ storage which gives you unlimited space.
- Step 3
Backup your photos to google drive
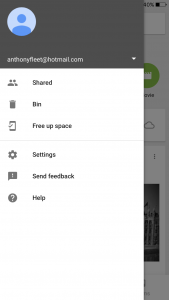
On the google photos app, tap the three lines in the top corner of your screen.
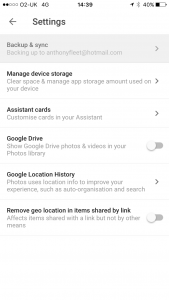
Then tap settings. Then tap backup and sync. Turn on the backup and sync slider (it will go blue when it’s on).
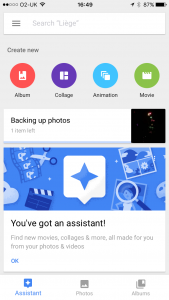
You can tap the bottom left icon, which is your ‘google assistant’, to see the progress of your photos being uploaded (recommended you do this over wifi, as this could cost you a lot of data otherwise).
- Step 4
In the Google Photos app, tap the three lines in the top left corner again. Then tap ‘Free up space’. Then tap ‘free up space’ again.
You’ll be told how many photos are about to be deleted, say yes to delete them as they’re now stored on your Google account.
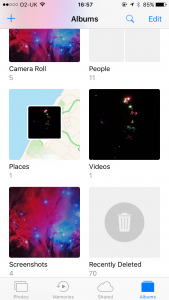
Nearly there now, just one last thing. You’ll need to go into your iPhone photos app and delete all pictures from your recently deleted folder. Once you’re in the recently deleted folder, you can tap ‘select’ at the top right corner, and you’ll then see the option to delete all in the bottom left corner.
Hope this helps!

